What exactly is a Shacket? It's a cross between an unlined jacket and a relaxed button-up shirt. Introducing the Bud Shacket the new pattern release from Seamwork for March!
Shackets are classic layering wardrobe basics. They are as versatile as a jean jacket and can be styled with the same versatility and creativity. This shacket pattern is also a sewing skill builder. You will learn how to sew cuff plackets, front button closures and collars. There are a several pocket combinations to choose from including pleated breast pockets and large patch pockets.
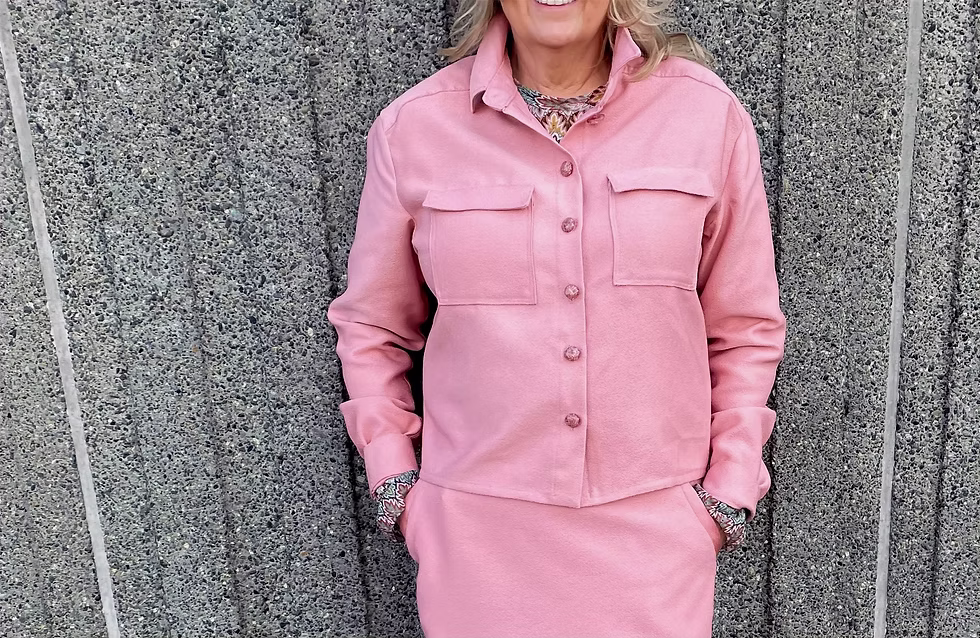
For my version of Bud I choose to create a cropped version. I wanted a shacket that would transition into spring that I could wear with dresses and pants. To create a cropped version I simply measured down from the center neckline to the where I wanted the hemline to be then added 1" for a rolled hem. I folded the pattern across and folded it up so that the curved hemline could be kept for a future make.
There are lots of great skills to learn when you are sewing this pattern. Once you have prepared all of your pattern pieces with interfacing and stay stitching you are ready to add the pockets. I chose flat breast pockets for my jacket as I didn't think the boucle fabric I was using would press flat enough with a pleat. To create the correct size pocket, I folded the paper pattern where the pleat would be, then cut out the pocket. It worked well and offers a streamlined version of the pocket and just this right size when you add the upper pocket flap. Seamwork's pattern directions, as usual are clear and easy to follow. They always include large detailed illustrations that help to show all of the necessary details.
As I created a cropped version of the shacket I didn't include the large patch pockets on my jacket.
This Shacket includes some really fun little details that give it a polished finished look. Creating the locker loop for the back yoke is one of these details. Once you have added the locker loop it is time to create your inner and outer back yoke. For this pattern construction you use the burrito method, another creative was to sew. Don't let any of this deter you if you are just beginning to sew more details like this. Everything is laid out for you in the pattern and you will love the results of the burrito yoke method.
There is quite a bit of top stitching for this particular make and it adds lovely details and really finishes everything off nicely. There is top stitching on the pockets, lapels and collar. You can use a coordinating top stitch as I did or a contrasting stitch for added detail.
Sewing the sleeve placket is lots of fun. The pattern pieces are clearly marked and so are the steps to creating the placket. It feels a bit strange to cut into the sleeve itself but it all flows together nicely and before you know it you have a professionally finished, detailed placket for each sleeve. Once you add the cuffs it looks pretty impressive.
I cut out a size 12 for my Shacket. There is 11" of ease for the pattern so you may want to size down if you don't want anything too oversized. My size 12 still provides ease for wearing a sweater underneath but it is not too big to wear over a dress or t-shirt as we head into warmer weather. I have plenty of room across the shoulders and graded it to a size 8 at the hip so it wouldn't look to sloppy. The only other adaptation that I made was to lengthen the length of the sleeve by 2" before adding the cuff. This gives me plenty of length to wear the cuff buttoned up or folded up for a more casual look.
For this Shacket I chose a blush pink boucle poly blend. It has nice stand and holds its shape. It also doesn't crease which will really help for packing on trips and taking along as an extra layer for evenings. I had just enough fabric left over to create a self drafted knee length skirt. This skirt is self drafted using the front of the Hudson pant from True Bias. I cut a rectangular piece that measures 1" wider than my hip measurement for the back then attach it to the adapted front piece of the Hudson pants. I simply place the center crotch on the fold and cut it out. This gives me a easy to wear skirt with stylish pockets- again another fashionable piece to transition into spring.
The Bud is definitely a classic wardrobe addition. I am looking forward to creating the longer version with the tails as well as another cropped version in satin. This will definitely be a go-to pattern for me as shacket styling is a feature in my wardrobe for any season.
After all.... There is Sew Much To Design!
Happy Shacket Sewing,
Lou Sheffer
Comments